Monday, September 13, 2010

No Holey Walls Here!

One of the topics that I’ve been really interested in exploring further is how to make your rental feel more like a home. These days it seems harder and harder for people to purchase a home of their own. After the bubble burst and so many homes foreclosed, more people are finding themselves renting again. 

As someone who loves decorating, I often struggle with how much to actually do to my rental so that it isn’t too much to undo later. Most people avoid painting since they usually have to paint the walls back later, or risk being charged upon move out. Some lease agreements are also really strict about putting holes in the walls and hanging pictures.

I’ve gone both ways in my past rentals. I have painted the walls in places that I knew I’d be staying for a while, hung shelves and larger items that left relatively large holes which I had to patch later. How much to do is something you have to evaluate on a case-by-case basis and decide how much you are willing to take on.

After renting for so many years I've learned that you don’t have to sacrifice a designer home just because you don't own it.

Our current rental was built in the 50’s and the walls are pretty old. I’ve tried to limit how much we hang with nails and haven’t yet decided whether or not to paint (although I am leaning toward painting more and more – now to convince Kevin!).

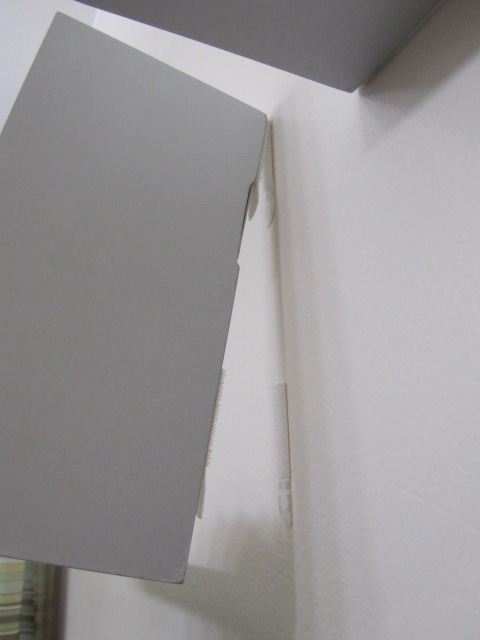
I recently found a new “tool” that I love which makes hanging things really easy and doesn’t damage the walls. For some of the smaller/lighter items, I used Command Strips by 3M. If you haven’t tried them yet, I would highly recommend you do. They are an inexpensive, clean, and super easy to use alternative to nails and a great way to achieve a designer look without damaging the walls.
Check out the 3M website for printable coupons.


Happy Hanging!


Below is one of my Command Strip projects in action. Simply follow the directions on the package and presto, a pretty bathroom wall vignette.


Inspiring Interiors

I didn't have much time to work on my blog posts this weekend because I was busy spending some quality time with Kevin and working on one of my friend's design projects. I found these unique wallpapered rooms last week when I was rummaging through the Elle Decor archives and when I came across them again today, my design juices started flowin'.  I absolutely had to get them posted tonight.

Asian wallpapers are so unique. They often depict nature scenes rather than the more common patterned wall-prints.
How cool is this wallpaper? It oozes inspiration. I can just picture some old writer tearing  his favorite passages from his favorite books and saving them on the walls for later!
The small scale of the wall print creates a sense of balance with the heavy furniture and over-sized accessories.
What a great idea for a little explorer's room! This would actually be really easy to do and it's super chic.
Va-Va-Voom! Where's my bustier and red lipstick.  Peacock feathers in a bathroom are fashionable and sexy to boot.
I love everything about this room.  The wallpaper is subtle and beautiful and creates interest on the walls of this gorgeously-eclectic room.
Um, yes please! Metallic papered closet walls as an accessory for your accessories..
Whimsical words add warmth and the horizontal lines of text bring a sense of calm to the space.
Daring choices in this small bathroom came together to create an inviting and fashionable space.

Thursday, September 9, 2010

Amish Friendship Bread

Since last weekend was Labor Day and the man was in Las Vegas at a bachelor party (no comment!!) I didn't do a whole lot of note-worthy cooking. I did however make my first ever Amish Friendship Bread. Never heard of it? Neither had I until a co-worker asked me if I'd be interested in trying it out. 

Basically, it's baking chain-mail!

First, you get a 1-cup starter of batter from a friend. If you don't have a starter, you can make one yourself. I found a basic Amish Friendship Bread starter recipe on momswhothink.com just in case.

Next, you follow the recipe below for the next ten days and when you are done, you end up with three 1-cup starters to pass onto friends and two deliciously-sweet loaves of cinnamon bread.  Yum!
The Starter

The Recipe
  • Do not use metal spoon or bowl for mixing
  • Do not refrigerate mix
  • If air gets into the bag, let it out
  • It is normal for the batter to rise, bubble and ferment
Day 1   This is the date written on the bag; do nothing
Day 2   Squeeze the bag
Day 3   Squeeze the bag
Day 4   Squeeze the bag
Day 5   Squeeze the bag
Day 6   Add 1 cup of flour, 1 cup of sugar, and 1 cup of milk. You may need to transfer to a large ziplock   bag and squeeze until mixed. (If already in a gallon ziplock, keep it as is.)
Day 7   Squeeze the bag
Day 8   Squeeze the bag
Day 9   Squeeze the bag
Day 10  Place batter from bag into a large bowl and add 1 cup of flour, 1 cup of sugar, and 1 cup of milk to the batter. Mix with a wooden spoon or spatula. Pour three 1-cup starters into ziplock bags. Write the date on each bag. Give the starters to three friends with a copy of the instructions.

With the remaining 1-cup starter, add the following to the batter:
1 cup oil        
1 cup sugar
1 tsp vanilla   
3 eggs
1 1/2 tsp baking powder
1/2 tsp baking soda
1/2 tsp salt
1 large box vanilla pudding mix
2 tsp cinnamon
2 cups flour
1/2 cup milk

Mix all and pour into two large loaf pans that have been greased and dusted with cinnamon and sugar. Sprinkle cinnamon and sugar on the top of the batter before it goes into the oven as well.
Bake at 325 degrees for 45-60 minutes or until toothpick comes out clean.
Optional: Add 1 cup chopped nuts and/or 1/2 cup raisins.
Delicious! And, it goes great with coffee.

Okay, I know you may be thinking that allowing all of the ingredients to sit out on the counter to ferment can't be safe, but people have been making this exact recipe for years and I didn't get sick, so I think it is good to go.

Happy baking!

Inspiring Interiors

I took some time today to browse some of the archives on the website of one of my favorite magazines, Elle Decor. Check out some of these beautiful and inspiring collage walls.  

Saturday, September 4, 2010

E-Designs

So, I have my first real project and I couldn't be more excited!  I have a wonderful, talented friend who is also a photographer and she and I have decided to collaborate to turn her home into a studio for her boudoir photography venture!  

This is a project that we will work on over the next couple of months, however to get our creative juices flowing and give us a starting place for inspiration, I created two mood boards for her.  

Check them out:

The first board has more of a monochromatic, black and white theme with simple, yet bold pops of color.  The furniture is all very feminine and sexy and I incorporated soft elements such as a fur rug, ruffled drapes and feathers to create a sense of whimsy.


The second board is a little bit more romantic and not quite as sexy as the black and white board.  I used the contrast of the light teal with the vibrant red to give the overall feeling a little bit of an edge that you would expect to see in a boudoir.
 
As I mentioned, I won't have the full project ready to share for a few months, but I will make updates as we go.  I am thrilled to be designing again and can't wait to see the outcome of this space!  

Happy Designing!


Sunday, August 29, 2010

What's for Dinner?

I love to cook.  In fact, I cook about 5-6 nights per week.  From what I hear, that’s pretty rare these days.  Most people act really surprised when they find out that I cook so often.  I really enjoy it and I’m actually pretty good most of the time.  Sometimes I worry though that Kevin’s gotten so spoiled, if I ever stopped cooking, he might not stick around! 

The thing I like about cooking is experimenting with food and flavors.  In many ways cooking is a lot like design and decorating.  It’s all about marrying flavors and textures with a little bit of technique to create something harmonious and delicious.

The other thing I like about cooking is it’s much, much healthier than eating out or eating prepackaged foods.  Don’t get me wrong, I use boxed rice or pastas from time to time, but I try to marry them with fresh veggies and proteins whenever I can.  I don't own many cookbooks since you can find just about anything online these days, so I frequently use Google for recipe inspiration.  I have found however, that many recipes are really unhealthy, so I try to alter them to be my own healthier versions. 

Tonight we had Sweet and Tangy Glazed Salmon with roasted red potatoes and steamed mixed veggies.  I found the salmon glaze recipe below on allrecipes.com

All Recipes Ingredients
  • 6 tablespoons butter
  • 1 1/2 cups brown sugar
  • 4 1/2 tablespoons lemon juice
  • 2 1/4 teaspoons dried dill weed
  • 3/4 teaspoon ground cayenne pepper
  • 1 pound salmon fillets, with skin
  • lemon pepper to taste
This glaze is actually really bad for you.  It calls for 6 TBLS of butter and 1 ½ cups of brown sugar!  That’s A LOT of fat and sugar to put on a piece of fish

I tweaked the recipe and made it much healthier and still very delicious. 

See below for details and instructions.  (For best timing, prepare potatoes first and get them in the oven so that they are finished just in time for the salmon and veggies to be done.)

Salmon Glaze Ingredients
  • 1 1/2 tablespoons butter
  • 3 tablespoons brown sugar
  • 4 tablespoons lemon juice
  • 1 teaspoon dried dill weed
  • 1/2 teaspoon ground cayenne pepper
  • 2 tablespoons lite soy sauce
  • ½ teaspoon sea salt

Glazed Salmon Directions 
  1. Melt the butter in a saucepan over medium heat, and mix in the brown sugar, lemon juice, dill, and cayenne pepper. Cook and stir until the brown sugar is dissolved.  Add lite soy sauce and salt.  Reduce heat and simmer until ready to brush onto the salmon.  
  2. Preheat a grill pan on stove med-high heat and coat with olive oil non-stick spray. 
  3. Trim, de-bone and prepare salmon.  Lightly season salmon with sea salt, pepper and onion powder and place directly on the grill, flesh side down. Lightly brush skin and sides of salmon with glaze while flesh side browns about 4 minutes.  Flip salmon onto skin side and brush frequently with the glaze.  Cook the salmon 10 minutes more, or until cooked through.

Roasted Red Potatoes
  1. Preheat oven to 450 degrees.
  2. Chop 4 large red potatoes into small triangles and place in non-stick baking dish.
  3. Drizzle with 1/4-1/3 cup extra virgin olive oil and lightly sprinkle with sea salt, black pepper, garlic powder, onion powder, paprika and oregano.  Stir until all potatoes are well coated.
  4. Put potatoes in the oven for 25-30 minutes until brown and crispy on one side.  (for best crisp do not stir potatoes once in the oven)


Steamed Mixed Veggies
  1. Boil water in steamer pot.
  2. Steam 1 cup frozen edamame in shells.
  3. Slice 1 large or 2 small zucchinis about a 1/4 inch thick.  Chop 1 cup broccoli.
  4. Remove edamame from steamer and add zucchini and broccoli to steamer pot.
  5. Remove edamame beans from shells and add back into steamer with other veggies.
  6. Steam until all are bright green and still have a slight crunch.
  7. If desired, sprinkle with a tiny bit of sea salt for flavor.

Dinner turned out really tasty and not heavy at all.  The salmon was sweet and smoky with a little heat from the cayenne and the oregano in the potatoes paired really nicely with the dill in the salmon glaze.


I hope you will try my version of Sweet and Tangy Glazed Salmon and let me know what you think.

Happy cooking!


Delicious Designs

Even though we are only renting our new house, I still find myself daydreaming about what our yard could be!  I recently came across this article from Sunset Magazine featuring some awe inspiring patios.  

I love the designer look of this patio.  The use of minimal plants, accented with warm, vibrant colors and textures makes the space feel luxurious and inviting.

The monochromatic use of plants in this quaint little space is really well executed and the various shades and tones of green and blue keep your eye bouncing around the yard.
The simplicity of this drought tolerant garden reminds me of home in northern CA.  It looks like a lovely place to relax with a glass of wine and a good friend.
Does this one really need an explanation?  I think not.  Love the letters!
Talk about a true extension of the home.  I would love to be invited to a party here.
The contrast of smooth and soft in this patio makes me want to play hopscotch!  I love the puzzle-like effect this look creates and it's a great way to reduce water usage.
This patio feels like San Diego.  The sailcloth brings movement to the space and colors are so classically desert.
See more beautiful patios here.